Contents
Here you’ve easy and simple method to BypassFRP Alcatel Murti 3 without PC, just follow our few easy steps and you’ll be able to get your Alcatel idol back to third, unable to bypass your Alcatel Google Account Are you Noteworthy: This method is successfully applied to ALCATEL fig 3 (6045), Android 6.0.
Msm Download Tool for flashing
This method will also work for:
◊ Alcatel Pop3 ◊ POP4 ◊ Pix 3 ◊ PIXI 4 ◊ Idol 3 ◊ Idol 4 ◊ fire
Start by bypassing the FRP Alcatel Murti 3:
Phase 1:
Step: Connect to WiFi in your Alcatel device.
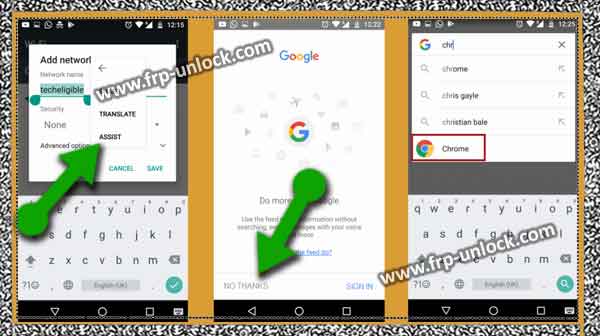
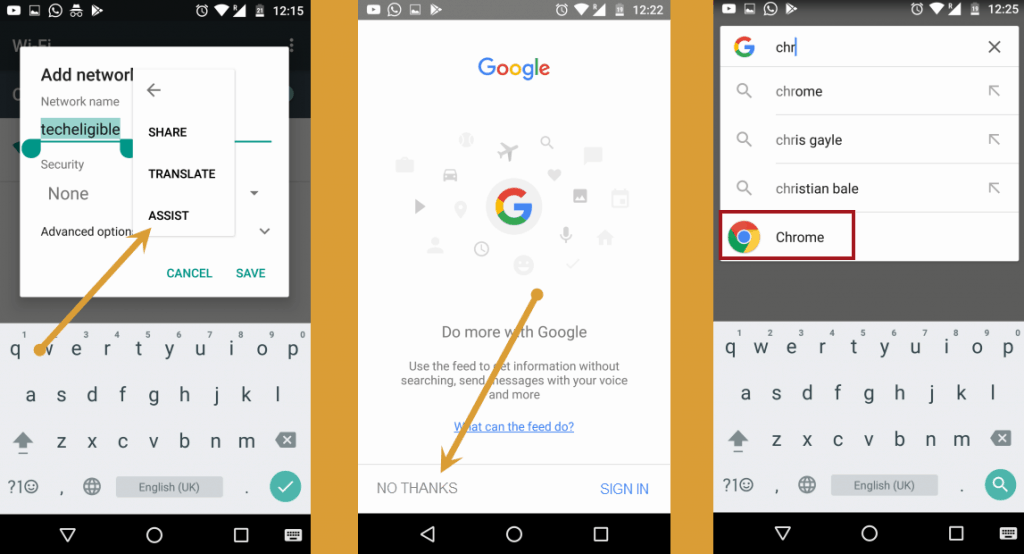
Step: Tap “Add Network”, and type a text into the SSD field, E, G “Tecaliable”.
Step: Tap on your typed texts so that (Cut, Copy, Share, Assistant) options appear there. Tap “Assistant”, Google will Now, open, tap “No thanks”, then type the search bar in Chrome, then tap “Chrome icon” to open it.
Oppo A37 Stock Firmware ROM (Flash File)
Phase 2:
Step: Tap “Accept and Continue”.
Step: Then type “BypassFRPApplications and Files Pangu”.
Step: Now, Tap is the most relevant result from Google search engine.
Step: you’ll be redirected to the Pangu.in website, from which you’ll have to download the APK files. BypassFRP Alcatel Murti 3, Bypass Alcatel Murti 3 Google Account, Alcatel Statue Unlock 3, Bypass Alcatel Google Verification
Download 2 APK files to bypass the FRP Alcatel statue 3:
Step:3
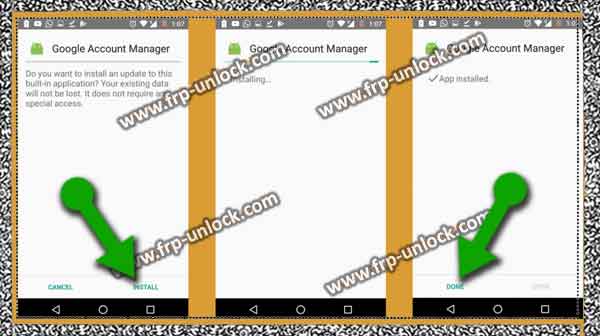
Step: The first download “Google Account Manager 6.0” according to your Android version.
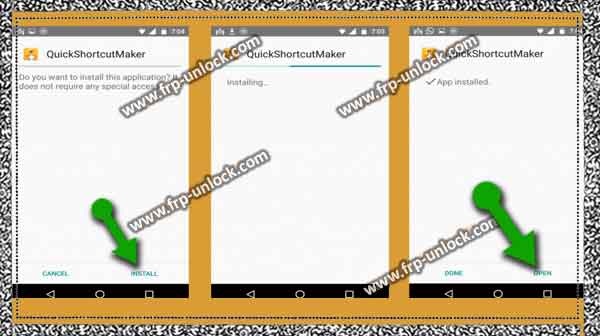
Step: Second, download “Quick Shortcut Maker” in your successful BypassFRP Alcatel Murti 3. [Perfectpullquote cites align = “left” = “” link = “” color = “” class = “” size = “”] Note: [/ perfectpullquote] You kNow after downloading the finish you’ll have a Pop-up at the bottom of your screen that tap on “open” Pop-up, you’ll be taken to the “folder” where you’ll be able in your downloaded application. BypassFRP Alcatel Murti 3, Bypass Alcatel Murti 3 Google Account, Alcatel Statue Unlock 3, Bypass Alcatel Google Verification
Install downloaded APK files:
Step: Tap “Install Google Account Manager, tap”, then tap “Done”. BypassFRP Alcatel Murti 3, Bypass Alcatel Murti 3 Google Account, Alcatel Statue Unlock 3, Bypass Alcatel Google Verification
Step: Tap on “Quick Shortcut Maker”, tap “Install”, then tap “Open”. BypassFRP Alcatel Murti 3, Bypass Alcatel Murti 3 Google Account, Alcatel Statue Unlock 3, Bypass Alcatel Google Verification
Add a new Gmail account:
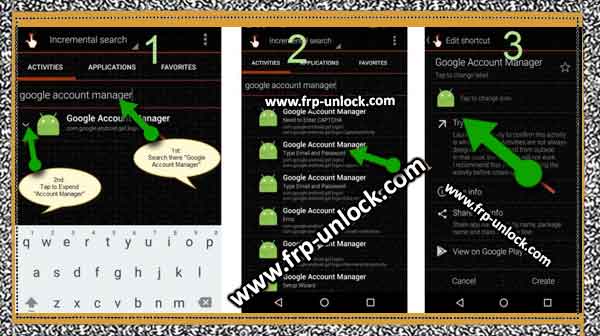
Step: Type in the search bar for Google Account Manager, tap on it to expand it, then select one of the Google Account Manager, with “Type an account email and password”.
Step: Tap “Try”. BypassFRP Alcatel Murti 3, Bypass Alcatel Murti 3 Google Account, Alcatel Statue Unlock 3, Bypass Alcatel Google Verification
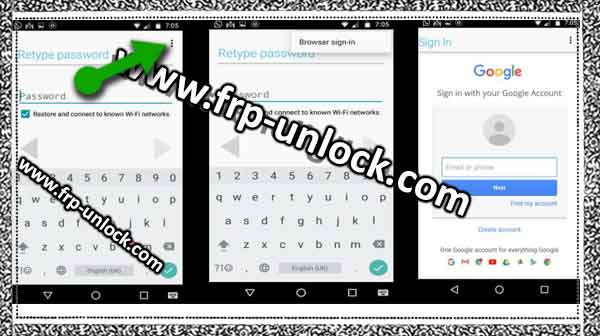
Step: After that tap, after “Browser sign-in”, tap “3 Points/Dots” in the top right corner.
Step: Add your legitimate Gmail account.
Step: Restart your Alcatel Idol 3 device.
Note: In case “3 dots” is missing in the top right corner, then click here to fetch “3 dots”. BypassFRP Alcatel Idol 3, Bypass Alcatel Idol 3 Google Account Unlock Alcatel Idol 3, Bypass Alcatel Google Verification
DownloadTool v1728.31 GSM ANIL rar
Full initial setup:
After restarting the Finnish, you’ve to complete your initial setup by liking the “Skip, later, any thanks” option.
Step: After completing the initial setup, you’ll have access to all the options in your Alcatel Murti 3 device, Now, you’ve to add a Gmail account again.
Step: Tap “Settings,“, then tap “Accounts” and then add your Gmail account.
Summary:
Connect to Wi-Fi Connect, tap “Add Network”, type some text there, tap your typed text, then tap “assis”. Search in Google (disable BypassFRPApplications and files). ↗ Download (Google ACC Manager and Quick Shortcut Maker), Install them, and open Quick Shortcut Maker. Type in the Google Accident Manager, expand it, select a Google Accident Manager that appears (Type email and password) Tap “TRY”, then after “Browser sign-in” tap “3 Points/Dots from the top right corner”,
Now, add your new Gmail account. Please restart your Alcatel device, finish “Initial Setup”, go to Settings,, Account, Add Account there. Sharing is caringSo, Share it on Social Media