Contents
Bypass Google FRP and solve this problem, “This device was reset, continue, sing to a Google account that was previously synced to this device”, In case you forgot your Gmail account, and In case you accidentally reset your hardware or reset your device softly, then you definitely need a previously synced Gmail account to unlock this device. In case you don’t know what your Gmail ID is and by no means can you recover your Gmail account, then you’ve to follow the method below to unlock your Samsung Galaxy device.

Note: This method has been successfully tested with Samsung Galaxy on Max, but this method will be compatible with all Samsung Galaxy devices except the Android version 5.
Let’s start by Google FRP Bypass:
Step: First of all, connect to Wi-Fi in your Samsung Galaxy device.
Step: First go back to the “Welcome” screen. Press “Home button” 3 times 3 to enable the TalkBack feature.
Step: In case your device does not have a “Home button”, “Long tap with two fingers” until TalkBack is enabled.
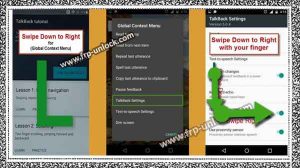
Step: After that, you’ll see a Talkback Tutorial screen. Draw “L” on your screen by swiping right to bring up the “Global context menu” screen.
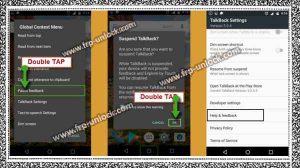
Step: Double tap ” Talkback Settings,“. Google FRP bypass, device was reset, sign in with a Google account, BypassFRP lock, delete Google verification, add new Gmail account “Now drag” L “again, and then tap” Stop Respond “twice to suspend Talkback.
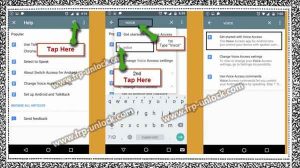
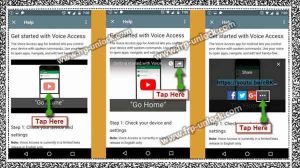
Step: Now, “ok” to successfully suspend the tap back again. Tap on “Help and Feedback” help. Google FRP bypass, device was reset, sign in with a Google account, BypassFRP lock, delete Google verification, add new Gmail account Tap on “Search icon” and type the search bar “Voice” and then tap “Voice” from the result.
Step: Now, tap on “Start with Voice Access”. Google FRP bypass, device was reset, sign in with a Google account, BypassFRP lock, delete Google verification, add new Gmail account
Step: Tap Youtube video play icon.
Step: Now, tap on “Share Arrow” and after that tap is “3 Dots”.
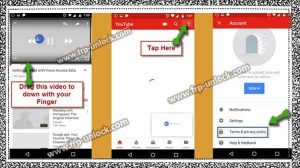
Step: you’ve used “YouTube website” and Now, you can easily reach Google FRP Google bypass. Google FRP bypass, device was reset, sign in with a Google account, BypassFRP lock, delete Google verification, add new Gmail account Tap on YouTube youtube video and drag it down.
Step: Then, tap “3 dots” in the top right corner, and select “Rules and Privacy Policy”.
Step: This will open Google Chrome or Internet browser in your Samsung Galaxy device. Google FRP bypass, device was reset, sign in with a Google account, BypassFRP lock, delete Google verification, add new Gmail account
Download Quick Shortcut Maker:
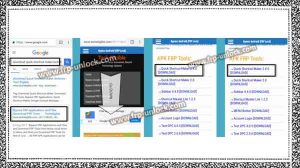
To bypass FR Google FRP, you need to download Quick Shortcut Maker. Search in the Google search bar, type “Download Quick Shortcut Maker”. Open the “BypassFRPApplications and Files …” link from search results.
Step: Download Now, from “Quick Shortcut Maker 2.4.0” After downloading the Finnish, you’ll see the Pop-up bottom of your screen, just tap “Open”.
Note: In case you’re in “Internet Browser”, tap “Download bookmark ➔ History ➔ Download history”. Google FRP bypass, device was reset, sign in with a Google account, BypassFRP lock, delete Google verification, add a new Gmail account, download QuickQuick Maker
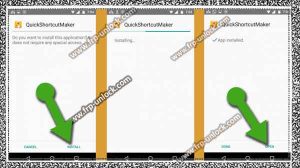
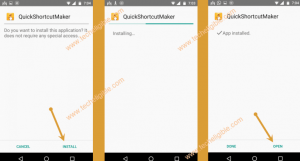
Step: Now, you’ve access to “Download Folder”, where you can see your downloaded APK file “Quick Shortcut Maker”. Tap “Quick Shortcut Maker” to Install it.
Step: you’ll get a Pop-up of “Installation Blocked“, just tap “Settings,“, and enable “Unknown Source” from there.
Step: Now, tap “Install”, and then tap “Open” to go to Quick Shortcut Maker.
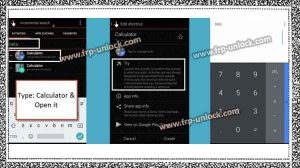
Note: In case you’ve to BypassFRPs from your device, you can use our “Pangu Premium Service”, then unlock the network remotely for BypassFRP and SAMSUNG ZTE, Moto, LG, HTC. Google FRP bypass, device was reset, sign in with a Google account, BypassFRP lock, delete Google verification, add new Gmail account Type in the Search Search Bar “Calculator”. Tap on “Calculator” to open it.
Step: Then, tap “TRY”.
Step: Now, the “calculator” will open.Google FRP bypass, device was reset, sign in with a Google account, BypassFRP lock, delete Google verification, add new Gmail account
Type the code in the calculator:
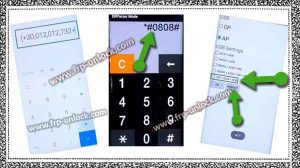
Type in calculator “(+30012012732+)
Step: Now, the DRParser mode will open, type “* # 0808 #”
Step: USB Settings, will open, tap “DM + ACM + ADB”, then tap “Reboot” After Reb reboot, you’ve “Welcome!” The screen
Note: In case you’ve the latest Galaxy S8 + or Galaxy S8 Android 8.0, and FRP is unable to bypass the lock via this method, click here Bypass Google FRP, reset device,Remove Google Verification, sign in with a Google account, BypassFRP lock, then add new Gmail account
Step: After starting again, you’ll get a “Talkback” Pop-up.
Step: Press and Hole (Volume UP + Volume Down) keys together for 1-2 seconds.
Step: After that, you have a “suspend talkback” Pop-up, just tap “ok” twice.
Step: Now, you’re on the “Welcome Screen”, and you’ve successfully enabled “ADB mode”
Download BypassFRP Tools for your computer:
Samsung USB Driver ☁ FRP Assistant v 0.2 [download] Turn off antivirus software Install Samsung USB Driver. Extract FRP Helper from the Collection
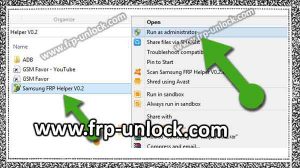
Step: Ensure that you’ve turned on antivirus Right-Click on ” Samsung FRP Helper V 0.2″, and run as an Administrator Bypass Google FRP, reset device,Remove Google Verification, sign in with a Google account, BypassFRP lock, then add new Gmail account
Connect the device to the computer to bypass Google FRP:
Step: Ensure your device is on Connect the Samsung Galaxy device to your computer via Micro USB cable to bypass FR Google FRP.
Step: Now, go to the Samsung FRP Helper Software.
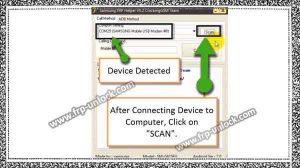
Step: Click the “Scan” button, and you’ll get your device com port.
Note: After clicking “Scan”, you’ll see a message of “USB debug” in your phone, just click on “okay.” Bypass Google FRP, reset device, sign in with a Google account, BypassFRP lock,Remove Google Verification, to add new Gmail account, Samsung FRP Helper v0.2
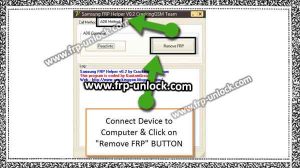
Step: Click on “ADB mode”, then click on the “Remove FRP” button.
Step: In case you see “Not Found Device” by clicking on the “Remove FRP” button, of the problem, the software will identify your device and the device will then start to overcome this issue reset.
Caution: , well, use a micro USB cable so that computers and software can easily detect their device In case the software device is not detected, then you can remove the barrier FRP. Bypass Google FRP, reset device, sign in with a Google account, BypassFRP lock,Remove Google Verification, to add new Gmail account, Samsung FRP Helper v0.2
Step: Once you see the message “FRP DONE”, disconnect your device.
Step: After that, wait for auto start.
Step: Restart your device Now, using “power key”.
Step:
Note: In case you bypass Google FRP after completing the “Samsung FRP Helper v0.2” file, and delete the active antivirus software. Donate me
